意外とネットにあまり情報がなかったので情報共有です。
使う機会は結構あるかもしれないので。
はじめに
Tensorflowにも搭載されている Keras dataset API。
モデルの検証にload_data()で読み込んだ画像データ等をよく使用しますが、
データを目視で確認したい時に、Notebook等では限界があります。
そんな時に、すべてのデータをローカルで保存、可視化する方法です。
(1) CIFAR10、CIFAR100 画像への変換方法
(2) MNIST、Fashin-MNIST 画像への変換方法
(3) IMDB Review、Reuters Topics テキストへの変換方法
(4) Boston Housing data のcsvへの変換方法
この記事では「(1) CIFAR10、CIFAR100画像への変換方法」について書いています。
ソースコード一式
こちらに(1)~(4) すべてのコードを一括したファイルをアップしています。
コード見たほうが早いわーな方はどうぞ。

CIFAR10、CIFAR100 の画像保存
from tensorflow.keras.datasets import cifar10, cifar100

# Load data from keras API
(x_train, y_train), (x_test, y_test) = cifar10.load_data()
まず、load_data()で、train, testにデータを読み込むのですが、
CIFAR10/100の場合、yの配列にクセがあります。
具体的には、y_train, y_testにはクラスIDが格納されていますが、
[1,2,3,・・・] のようにそのままint配列が入っているのではなく
[[1],[2],[3],・・・]のように要素1の配列を持つ二次元配列になってます。
なので、クラスIDを取り出すには
y_train[n][0] のように記述する必要あり。
CIFAR10 のクラス定義 保存
下記リンク参照。

| ID | Class |
| 0 | airplane |
| 1 | automobile |
| 2 | bird |
| 3 | cat |
| 4 | deer |
| 5 | dog |
| 6 | frog |
| 7 | horse |
| 8 | ship |
| 9 | truck |
まず、クラス定義します。
TrainデータとTestデータを分けて保存したいので、
まずは、”train” “test”というフォルダを生成、
その下に「クラスID_クラス名」でフォルダを生成します。
import os
import numpy as np
from PIL import Image

OUT_DIR = 'cifar10'
# define class names
class_list = ['airplane', 'automobile', 'bird', 'cat', 'deer', 'dog', 'frog', 'horse', 'ship', 'truck']

# make train/test dirs and class dirs
for cid, class_name in enumerate(class_list):
    os.makedirs(os.path.join(OUT_DIR,'train', '{:d}_{}'.format(cid,class_name)), exist_ok=True)
    os.makedirs(os.path.join(OUT_DIR,'test', '{:d}_{}'.format(cid,class_name)), exist_ok=True)
画像変換はよくやる「numpy → Pillowで画像化して保存」です。
具体的には、
Image.fromarray(numpy_data).save(filepath)
で、画像保存します。
まずはTrainデータの保存。
クラスIDを見ながら先ほどのフォルダごとに一個一個保存していきます。
# convert train data
for num, (x_data, y_data) in enumerate(zip(x_train, y_train)):
    cid = y_data[0] # y_data is an 1 element array
    # make file path
    fpath = os.path.join(OUT_DIR,'train', '{:d}_{}'.format(cid,class_list[cid]), 'train_{:05d}.png'.format(num))
    # convert numpy to pillow and save
    Image.fromarray(x_data).save(fpath)
Testデータもほぼ同じように。
# convert test data
for num, (x_data, y_data) in enumerate(zip(x_test, y_test)):
    cid = y_data[0] # y_data is an 1 element array
    # make file path
    fpath = os.path.join(OUT_DIR,'test', '{:d}_{}'.format(cid,class_list[cid]), 'test_{:05d}.png'.format(num))
    # convert numpy to pillow and save
    Image.fromarray(x_data).save(fpath)
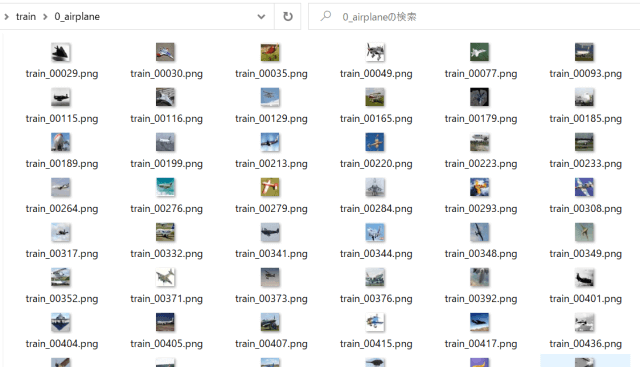
以下のように保存されます。
CIFAR100 のクラス定義 保存
CIFAR10とクラス定義が違うだけです。
クラス定義は、下記CIFAR100の項目のClassに記載されているのですが、
実際には記述順ではなく、
アルファベット順にソートしたものがClass IDとなっています。
具体的には、以下の通り。
| ID | Class | ID | Class |
| 0 | apple | 50 | mouse |
| 1 | aquarium_fish | 51 | mushroom |
| 2 | baby | 52 | oak_tree |
| 3 | bear | 53 | orange |
| 4 | beaver | 54 | orchid |
| 5 | bed | 55 | otter |
| 6 | bee | 56 | palm_tree |
| 7 | beetle | 57 | pear |
| 8 | bicycle | 58 | pickup_truck |
| 9 | bottle | 59 | pine_tree |
| 10 | bowl | 60 | plain |
| 11 | boy | 61 | plate |
| 12 | bridge | 62 | poppy |
| 13 | bus | 63 | porcupine |
| 14 | butterfly | 64 | possum |
| 15 | camel | 65 | rabbit |
| 16 | can | 66 | raccoon |
| 17 | castle | 67 | ray |
| 18 | caterpillar | 68 | road |
| 19 | cattle | 69 | rocket |
| 20 | chair | 70 | rose |
| 21 | chimpanzee | 71 | sea |
| 22 | clock | 72 | seal |
| 23 | cloud | 73 | shark |
| 24 | cockroach | 74 | shrew |
| 25 | couch | 75 | skunk |
| 26 | crab | 76 | skyscraper |
| 27 | crocodile | 77 | snail |
| 28 | cup | 78 | snake |
| 29 | dinosaur | 79 | spider |
| 30 | dolphin | 80 | squirrel |
| 31 | elephant | 81 | streetcar |
| 32 | flatfish | 82 | sunflower |
| 33 | forest | 83 | sweet_pepper |
| 34 | fox | 84 | table |
| 35 | girl | 85 | tank |
| 36 | hamster | 86 | telephone |
| 37 | house | 87 | television |
| 38 | kangaroo | 88 | tiger |
| 39 | keyboard | 89 | tractor |
| 40 | lamp | 90 | train |
| 41 | lawn_mower | 91 | trout |
| 42 | leopard | 92 | tulip |
| 43 | lion | 93 | turtle |
| 44 | lizard | 94 | wardrobe |
| 45 | lobster | 95 | whale |
| 46 | man | 96 | willow_tree |
| 47 | maple_tree | 97 | wolf |
| 48 | motorcycle | 98 | woman |
| 49 | mountain | 99 | worm |
あとは、
CIFAR10保存コードのクラス定義を書き換えるだけです。
class_list = [
    'apple', 'aquarium_fish', 'baby', 'bear', 'beaver', 'bed', 'bee', 'beetle',
    'bicycle', 'bottle', 'bowl', 'boy', 'bridge', 'bus', 'butterfly', 'camel',
    'can', 'castle', 'caterpillar', 'cattle', 'chair', 'chimpanzee', 'clock',
    'cloud', 'cockroach', 'couch', 'crab', 'crocodile', 'cup', 'dinosaur',
    'dolphin', 'elephant', 'flatfish', 'forest', 'fox', 'girl', 'hamster',
    'house', 'kangaroo', 'keyboard', 'lamp', 'lawn_mower', 'leopard', 'lion',
    'lizard', 'lobster', 'man', 'maple_tree', 'motorcycle', 'mountain', 'mouse',
    'mushroom', 'oak_tree', 'orange', 'orchid', 'otter', 'palm_tree', 'pear',
    'pickup_truck', 'pine_tree', 'plain', 'plate', 'poppy', 'porcupine',
    'possum', 'rabbit', 'raccoon', 'ray', 'road', 'rocket', 'rose',
    'sea', 'seal', 'shark', 'shrew', 'skunk', 'skyscraper', 'snail', 'snake',
    'spider', 'squirrel', 'streetcar', 'sunflower', 'sweet_pepper', 'table',
    'tank', 'telephone', 'television', 'tiger', 'tractor', 'train', 'trout',
    'tulip', 'turtle', 'wardrobe', 'whale', 'willow_tree', 'wolf', 'woman', 'worm']
これで100クラスの画像が保存されるはず。
次回は、
(2) MNIST、Fashion-MNIST 画像への変換方法
について書きます。
最後まで読んでいただき、ありがとうございます!
ブックマーク登録、
ツイッターフォロー、
よろしくお願いいたします!🙇♂️🙇♂️
↓↓↓